
Introduction
Building a kitchen island with a sink and dishwasher can be a great addition to your kitchen. Not only does it provide extra counter space, but it also adds functionality and convenience.
This post will walk you through the step-by-step process of building your kitchen island with a sink and dishwasher. From gathering the necessary materials to installing the plumbing, we will cover all the essential details to ensure a successful project. So, if you’re ready to enhance your kitchen with a custom-built island, let’s get started!
Measure and Plan the Layout of the Kitchen Island
Measuring and planning the layout of your kitchen island with a sink and dishwasher is a crucial step to ensure a successful project. Here are the steps to help you measure and plan the layout:
Determine the Island’s Purpose
- Consider the primary function of the island, whether it’s for food preparation, dining, or additional storage.
- Decide where you want to place the sink and dishwasher for maximum convenience.
Measure the Available Space
- Measure the length and width of your kitchen to determine how much space you have available for the island.
- Consider leaving at least 36 inches (91 cm) of clearance on all sides of the island to allow for comfortable movement.
Mark the Layout
- Use painter’s tape or chalk to mark the proposed location of the island on the floor. This will help you visualize the space it will occupy.
Plan for Plumbing and Electrical
- Determine the placement of the sink and dishwasher. Ensure water supply and drainage lines are accessible and connected to the island.
- Plan for electrical outlets if needed, especially if you’re installing a dishwasher or want to use small appliances on the island.
Account for Overhang
- If you plan to have an overhang for seating, measure the depth of your countertop overhang. A typical overhang is around 12 inches (30 cm) for comfortable seating.
Check for Levelness
- Use a level to ensure that the floor in the proposed island area is level. If not, you may need to use shims when installing the cabinets to make them group.
Verify Clearances
- Check that there’s enough clearance for cabinet and drawer openings and for the dishwasher door to open fully without obstruction.
Confirm Cabinet Placement
- Decide on the size and placement of the cabinets that will make up the island’s base. Ensure they fit within the marked area.
Review Your Plan
- Double-check your measurements and layout to meet your functional and aesthetic requirements.
Seek Professional Advice
If you need clarification on plumbing or electrical requirements, consult professionals to ensure the island meets building codes and safety standards.
Finalize the Design
Once you’re satisfied with the layout, you can proceed to select cabinets, countertops, sinks, and other materials based on your plan.
Build the Base and Frame of the Island
To start building your kitchen island with a sink and dishwasher, you will need to confirm the placement of the cabinets. Decide on the size and placement of the cabinets that will make up the island’s base, ensuring they fit within the marked area.This stage is critical because it lays the groundwork for the remainder of the building process.
After confirming the cabinet placement, it’s essential to review your plan. Double-check your measurements and layout to meet your functional and aesthetic requirements. This will help you avoid any mistakes or miscalculations that could arise during the construction process.
If you need clarification on your island’s plumbing or electrical requirements, it’s highly recommended to seek professional advice. Consulting with professionals will ensure that your island meets building codes and safety standards, giving you peace of mind and avoiding potential future issues.
Finally, it’s time to build the base and frame of the island. Follow the instructions provided by the cabinet manufacturer or consult with a professional if needed. This step will require careful attention to detail and precision to ensure a sturdy and functional base for your island.
Building a kitchen island with a sink and dishwasher can be a complex project. Take your time, follow proper instructions, and don’t hesitate to seek professional help when needed. With careful planning and proper execution, you can create a beautiful and functional addition to your kitchen.
Install the Sink and Dishwasher Plumbing
Installing the sink and dishwasher plumbing in your kitchen island requires careful planning and attention to detail. Here are the instructions to take you through the process:
Materials You’ll Need:
- Sink and faucet
- Dishwasher
- Plumbing pipes and fittings (P-trap, supply lines, elbows, connectors)
- Pipe wrench
- Teflon tape
- Plumber’s putty
- PVC primer and cement
- Compression fittings (if using copper or PEX pipes)
- Adjustable wrench
- Screwdriver set
- Bucket
- Safety goggles
- Work gloves
Steps:
Plan the Plumbing Layout
- Determine the placement of the sink and dishwasher on your island. Ensure that they are aligned with the plumbing connections.
Cut Holes for Plumbing
- Using a jigsaw or hole saw, cut holes in the cabinet back or bottom to accommodate the water supply lines, drainpipes, and dishwasher electrical line.
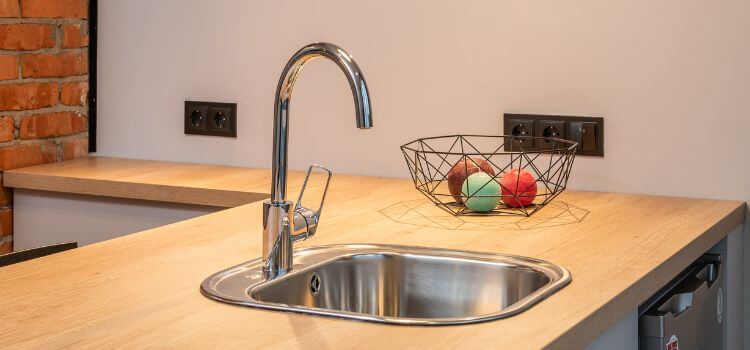
Install the Sink
- Set the sink into its cutout on the countertop, following the manufacturer’s instructions.
- Apply the plumber’s putty or silicone sealant to the sink flange to create a watertight seal.
- Attach the sink clips or brackets provided with the sink to secure it to the countertop.
Connect the Drainpipes
- Install the P-trap and tailpiece under the sink. Use PVC primer and cement or compression fittings, depending on your pipe material.
- Connect the drainpipe from the sink to the main drain line using the appropriate fittings.
Connect the Water Supply Lines
- Connect the hot and cold water supply lines to the faucet and the water shut-off valves. Use Teflon tape on threaded connections.
- Ensure that the connections are tight but not over-tightened, which can damage the threads.
Dishwasher Installation
- Follow the manufacturer’s instructions to install the dishwasher. This typically involves connecting the water supply line, drain hose, and electrical wiring.
- Secure the dishwasher to the underside of the countertop or the cabinet using brackets or screws provided.
Test for Leaks
- Turn on the water supply and check for leaks in the sink drain, faucet, and dishwasher connections.
- Look for water leaks while running the dishwasher cycle as well.
Secure and Insulate Pipes
- Use pipe clamps to secure pipes and prevent them from moving or vibrating.
- Insulate hot water pipes to conserve energy and reduce heat transfer.
Clean Up
- Clean up debris or excess putty, and ensure all connections are properly sealed and tightened.
Test for Proper Operation
Test the sink faucet and dishwasher to ensure they function correctly and there are no issues with drainage or leaks.
Finish Cabinet
Once you’re sure the plumbing is working correctly, finish the cabinet with the toe kick panel and any remaining trim or molding.
Apply finishing touches, such as paint or stain
Once you have completed the plumbing installation for your kitchen island with a sink and dishwasher, you can add the finishing touches to make it visually appealing. Consider painting or staining the cabinet to match the rest of your kitchen decor.
This will give it a cohesive look and blend seamlessly with the surrounding area. Choose a paint or stain suitable for use on wood and follow the manufacturer’s instructions for application.
Apply multiple coats if necessary to achieve the desired finish. Additionally, you can add any remaining trim or molding to enhance the overall aesthetic of the kitchen island. This will make it seem polished and professional. Take your time during this step to ensure that everything is aligned correctly and secured.
Test and Ensure Proper Functionality of the Sink and Dishwasher
Testing and ensuring the proper functionality of the sink and dishwasher in your kitchen island is crucial to ensure they work as intended. Here’s how to test them:
Testing the Sink
1. Turn On the Water Supply:
- Ensure that the water shut-off valves under the sink are fully open.
- Turn on the hot and cold water faucets to allow water to flow to the sink.
2. Check for Leaks:
- Carefully inspect all connections, including the faucet, water supply lines, and drain pipes, for any signs of leaks.
- If you notice any leaks, immediately turn off the water supply and address the issue by tightening connections or replacing faulty parts.
3. Test the Faucet:
- Turn on the faucet and check for proper water flow and temperature adjustment.
- Test both hot and cold water to ensure they work correctly.
4. Fill and Drain the Sink:
- Fill the sink with water and let it drain to ensure that the drain system functions appropriately and that the water drains without clogging.
Testing the Dishwasher
1. Power On the Dishwasher:
- Make sure the dishwasher is connected to a power source and that it’s turned on.
2. Load the Dishwasher:
- Load the dishwasher with a few dirty dishes or utensils.
3. Add Dishwasher Detergent:
- Add the appropriate dishwasher detergent to the dispenser per the manufacturer’s recommendations.
4. Start a Dishwashing Cycle:
- Follow the dishwasher manufacturer’s instructions to start a wash cycle.
- Look for any strange sounds or vibrations that might signal a problem.
5. Monitor the Dishwasher:
- Observe the dishwasher during the wash cycle to ensure that water fills the tub, the spray arms are rotating, and the detergent is dispensed correctly.
6. Check for Leaks:
- While the dishwasher is running, inspect the area around and under the dishwasher for any signs of water leakage.
7. Assess Cleaning Performance:
- Once the dishwasher cycle is complete, check the dishes and utensils for cleanliness. Ensure the dishwasher has effectively removed any food residue and left your dishes clean.
8. Test the Drainage:
- Verify that the dishwasher drains properly without leaving water in the bottom of the tub.
9. Inspect the Dishwasher Interior:
- Check for any remaining water or moisture inside the dishwasher after the cycle.
10. Address Any Issues: – If you encounter any problems during the testing process, refer to the dishwasher’s user manual for troubleshooting steps or consider seeking professional assistance.
Conclusion
Building a kitchen island with a sink and dishwasher can be challenging but rewarding. By following the steps outlined in this blog post and using the right tools and materials, you can create a functional and stylish addition to your kitchen. Remember to plan carefully, measure accurately, and seek professional help. With patience and persistence, you can successfully build a kitchen island that will enhance the functionality and aesthetics of your kitchen space. Happy building!