
Introduction
Are you tired of the old and dull look of your kitchen sink? Do you want to give it a youthful and vibrant makeover? Painting your kitchen sink might be the solution you’re looking for! In this guide, we will discuss the steps and materials needed to successfully paint your kitchen sink and turn it into a beautiful focal point in your kitchen.
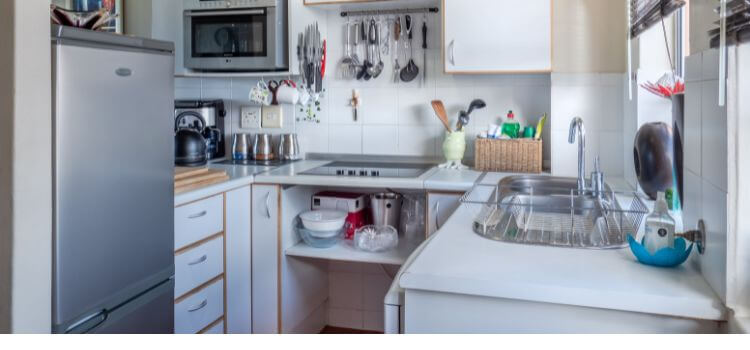
How to Paint Kitchen Sink

Before you start the painting process, properly clean and prepare the surface of your sink. You don’t want dirt or grime interfering with the paint’s adhesion. Once your sink is clean, it’s time to gather the materials you will need. You’ll want to use a high-quality epoxy-based paint designed explicitly for sinks. This type of paint is durable and can withstand water and daily use.
Once the first coat is dry, it’s time to apply the second coat. Again, apply a thin, even layer of paint and allow it to dry completely. Repeat this process until you have achieved the desired coverage and color. It’s essential to be patient and not rush this step. Thin coats of paint will give you a more professional finish.
After you have applied the final coat of paint and it has dried, it’s time to seal it. A clear sealant will protect the paint and enhance its durability. Apply the adhesive according to the manufacturer’s instructions, covering the entire painted area. Allow the glue to dry completely before using your newly painted sink.
You can transform your kitchen sink into a stunning piece that adds color and personality to your space. So grab your paintbrush, and let’s get started on this exciting project!
Cleaning the Kitchen Sink
Before you paint your kitchen sink, it’s essential to start with a clean surface. Remove any dirt, grime, or residue by thoroughly cleaning the sink with a mild detergent or cleaner.
Scrub away any stubborn stains or grease, and rinse the sink thoroughly to ensure it is free from any cleaning solution. Once the sink is clean and dry, you can move on to the next step.
You’ll want to prepare the sink for painting. Start by lightly sanding the surface of the sink with a fine-grit sandpaper. This will help to roughen up the surface and create a better bond for the paint. Be sure to rinse before proceeding to the next step.
Choosing the Right Paint

When painting your kitchen sink, it’s essential to choose the right type of paint that will withstand water and cleaning products. Look for a paint specifically designed for sinks or other high-moisture areas. Epoxy paint or enamel paint are good options to consider.
These types of paint have a durable finish and are resistant to water, stains, and chipping. Be sure to read the instructions on the paint can carefully before starting the painting process.
Start Painting

Once you have prepped your sink and chosen the right paint, it’s time to start painting! Begin by applying a thin coat of paint to the sink’s surface using a paintbrush or roller. Make sure to cover all areas evenly and smoothly. Using a brush, use long, even strokes to minimize brush marks. If using a roller, apply the paint in a crisscross pattern to ensure complete coverage.
After the first coat is dry, which may take a few hours, depending on the paint you are using, inspect the sink for any missed spots or uneven areas. Apply a second time as needed to get the job done. To be applied for the second time, the coat must be dried well.
Once you are satisfied with the coverage, let the final coat of paint dry for at least 24 hours before using the sink. This will ensure that the paint cures properly and becomes durable enough to withstand regular use and cleaning.
Protect the Countertop
Painting your kitchen sink can be a great way to update its look without spending a fortune on a new one. However, it’s essential to follow the proper steps to ensure a successful and long-lasting result.
It’s essential to protect the surrounding countertop and any nearby fixtures or appliances. Use masking tape and newspaper or plastic sheets to cover the areas you don’t want to get paint on.
Repairing Any Damage

Before you start painting your kitchen sink, it’s essential to inspect it for any damage. If there are any chips, dents, or cracks, you’ll want to repair them before applying paint. You can use a sink repair kit or epoxy resin to fill imperfections. Follow the instructions on the repair product and allow it to dry completely before moving on to the next step.
Once the sink is clean, you’ll need to roughen the surface to help the paint adhere better. You can use sandpaper or a sanding block to lightly sand the entire surface of the sink. This will create a rough surface for the paint to grip onto.
Applying Primer and Paint
Before you start painting, it’s essential to apply a good-quality primer to the sink. The primer will help the paint adhere better and provide a smooth and durable finish. Use a brush apply an even coat of primer to the entire sink surface.
Once the primer is dry you can start painting. Choose a high-quality epoxy paint specifically designed for use on sinks or other high-traffic surfaces. Use a brush or roller to apply an even coat of paint to the sink. Make sure to cover the entire surface and apply multiple coats if needed. It’s essential to allow each coat to dry before applying the next one.
Final Touches and Curing
Once you are satisfied with the coverage, let the final coat of paint dry for at least 24 hours before using the sink. This will ensure that the paint cures properly and becomes durable enough to withstand regular use and cleaning.
After the paint has cured, remove the masking tape and protective coverings from the surrounding areas. Give the sink a final wipe-down to remove any dust or debris.
Safety Precautions
When it comes to painting your kitchen sink, there are a few safety precautions you should keep in mind. Firstly, ensure you are in a well-ventilated area to avoid inhaling any fumes from the paint. Open windows or use fans to create airflow if necessary. It’s also essential to protect yourself by wearing gloves and a mask. This will prevent any contact with the paint and minimize the risk of inhaling any harmful chemicals.
Before applying the paint, it’s a good idea to tape off the surrounding areas to avoid accidental spills or splatters. Use masking tape to cover the edges of the sink and any other surfaces you want to use for vital protection.
FAQs
What paint can you use to paint a kitchen sink?
When it comes to painting your kitchen sink, it’s essential to use the correct type of paint that is specifically designed for surfaces that come into contact with water. Epoxy paint is a popular choice for painting kitchen sinks as it provides a durable and waterproof finish. Make sure to choose a paint suitable for sinks or bathroom fixtures.
Is it safe to paint a kitchen sink?
Painting your kitchen sink can be a great way to give it a fresh, new look. However, it’s essential to take the proper precautions to ensure a successful and safe paint job. First, it’s vital to choose the right type of paint specifically designed for surfaces that come into contact with water. Epoxy paint is a popular choice for painting kitchen sinks as it provides a durable and waterproof finish.
Can I paint my sink countertop?
Yes, you can paint your sink countertop. However, it’s essential to choose the right type of paint specifically designed for surfaces that come into contact with water. Epoxy paint is a popular choice for painting sink countertops as it provides a durable and waterproof finish. Before painting, properly clean and prepare the surface by removing any grease, dirt, or old paint. You may also need to use a primer to ensure better paint adhesion. Additionally, consider using a topcoat to provide extra protection and durability. It’s always a good idea to follow the instructions provided by the paint manufacturer for best results.
Can you change the color of the sink?
You can change from white to a new current color. White is still by far the most popular choice for bathroom sinks. More people are going back to classics and affordable options. However, it’s essential to choose the right type of paint specifically designed for surfaces that come into contact with water. Epoxy paint is a popular choice for painting sink countertops as it provides a durable and waterproof finish.
Conclusion
Painting your kitchen sink can be a creative project that can give your kitchen a fresh new look. However, it is essential to choose the right type of paint specifically designed for surfaces that come into contact with water. Epoxy paint is a popular choice for painting sink countertops as it provides a durable and waterproof finish. Additionally, consider using a topcoat to provide extra protection and durability. It’s always a good idea to follow the instructions provided by the paint manufacturer for best results. So, give your kitchen sink a new color and enjoy the transformation it brings to your space.